Affordable Interior Makeover: Transforming your living space doesn’t require a fortune. This guide explores practical strategies for achieving a stunning interior refresh without breaking the bank. We’ll delve into budgeting, material sourcing, DIY techniques, and design ideas to help you create the home of your dreams, regardless of your budget constraints. From repurposing existing furniture to strategically using paint and décor, we’ll unveil the secrets to a stylish and cost-effective makeover.
We’ll cover everything from defining “affordable” in your specific context to mastering DIY projects and finding incredible deals on materials. You’ll learn how to prioritize your needs, plan effectively, and execute your vision step-by-step, resulting in a beautiful and functional space that reflects your personal style.
Defining “Affordable”
The term “affordable” in the context of interior makeovers is highly subjective and depends heavily on individual circumstances. What constitutes an affordable renovation for a high-income earner in a major metropolitan area will differ significantly from the budget of a family with a more modest income in a rural setting. Understanding these variations is crucial for planning a successful and stress-free project.
The definition of “affordable” is intrinsically linked to income levels and geographic location. Cost of living, including labor costs and material prices, varies dramatically across regions. A renovation budget considered generous in one area might be considered restrictive in another. Furthermore, personal financial situations play a significant role. A 10% budget allocation might be perfectly reasonable for someone with a high disposable income, while it could represent a significant financial strain for someone with limited resources.
Budget Ranges for Interior Makeovers
Budgeting for an interior makeover requires careful consideration of several factors. Room size, the scope of the renovation (painting only versus a complete overhaul), and the choice of materials all influence the final cost. A small bathroom refresh might be achievable within a $1,000 – $3,000 budget, focusing on repainting, new fixtures, and possibly replacing the toilet. A larger kitchen remodel, however, could easily range from $5,000 to $20,000 or more, depending on the extent of the work, the quality of materials selected (e.g., custom cabinetry versus ready-to-assemble options), and whether professional installation is required. A complete living room makeover, including new flooring, furniture, and paint, could fall within a $3,000 – $10,000 range, again dependent on choices made regarding quality and materials. These are estimates and can vary considerably based on location and specific project requirements.
Strategies for Determining a Realistic Budget
Establishing a realistic budget is paramount to avoid overspending and project delays. The first step involves clearly defining the scope of the renovation. Create a detailed list of all necessary improvements, from paint colors to new furniture. Then, research the cost of each item individually. Utilize online resources, visit local stores, and obtain quotes from contractors for labor costs. Don’t forget to factor in unexpected expenses – a contingency fund of 10-20% of the total estimated cost is highly recommended. Consider prioritizing projects, focusing on high-impact changes that offer the most significant return on investment. For example, a fresh coat of paint can dramatically alter a room’s appearance at a relatively low cost. Finally, carefully track expenses throughout the renovation process to ensure you stay within your budget. Using a spreadsheet or budgeting app can be beneficial for maintaining organized records.
Prioritizing and Planning
Transforming your interior space on a budget requires careful planning and prioritization. A well-structured approach ensures you maximize your resources and achieve the desired aesthetic without unnecessary expenses. This section Artikels a step-by-step process to guide you through this crucial phase.
A successful affordable makeover hinges on effectively prioritizing needs over wants. This involves identifying essential improvements that enhance functionality and comfort, differentiating them from purely aesthetic upgrades that can be postponed or substituted with cost-effective alternatives. By focusing on functional improvements first, you establish a solid foundation for your project and avoid costly oversights.
Prioritization Process: Needs vs. Wants
This process helps distinguish between essential improvements (needs) and desirable enhancements (wants). Begin by creating a comprehensive list of all desired changes, then categorize each item as a “need” or a “want.” Needs directly impact functionality or safety (e.g., fixing leaky faucets, repairing damaged flooring), while wants are primarily aesthetic improvements (e.g., new paint color, decorative accessories). Prioritize needs first, allocating your budget to address critical issues before moving to wants. For example, replacing a broken window is a priority need over repainting a wall, even if the wall’s color is outdated. This systematic approach ensures your budget is used efficiently.
Pre-Renovation Checklist
Before commencing any renovation work, a thorough checklist ensures a smooth and efficient process. Overlooking even small details can lead to delays and unexpected expenses. This checklist covers crucial aspects that should be addressed before starting any work.
- Secure necessary permits: Check local building codes and obtain all required permits to avoid legal complications and potential fines.
- Establish a realistic budget: Create a detailed budget that includes material costs, labor costs (if applicable), and contingency funds for unexpected expenses. Consider using budgeting apps or spreadsheets to track expenses.
- Gather materials: Source materials in advance, comparing prices and ensuring availability. Consider using reclaimed or recycled materials to reduce costs. For example, repurposing old wooden pallets for shelving can significantly reduce expenses.
- Protect your existing furnishings: Cover furniture and floors with protective sheets to prevent damage during the renovation. This minimizes the need for additional cleaning or repairs later.
- Prepare the space: Clear the area of unnecessary items, ensuring easy access for work. This allows for a more efficient workflow and reduces the risk of accidents.
Sample Project Timeline
A realistic timeline is crucial for managing expectations and ensuring timely completion. This sample timeline illustrates key milestones and potential delays for a small-scale interior makeover, such as repainting a room and replacing flooring.
| Phase | Task | Timeline (Days) | Potential Delays |
|---|---|---|---|
| Preparation | Gather materials, secure permits | 3-5 | Permit delays, material unavailability |
| Demolition/Removal | Remove old flooring | 1-2 | Unexpected structural issues |
| Installation | Install new flooring | 2-3 | Installation difficulties, material defects |
| Painting | Prepare walls, paint | 2-4 | Drying time, unexpected wall damage |
| Finishing Touches | Decorating, furniture arrangement | 1-2 | Delayed furniture delivery |
This timeline is an example and should be adjusted based on the complexity and scope of your project. Unforeseen circumstances, such as material shortages or unexpected repairs, should be accounted for by incorporating a contingency buffer into the schedule. For example, adding an extra week to the timeline can absorb minor delays without impacting the overall project completion date.
Sourcing Affordable Materials
Transforming your home’s interior on a budget requires a strategic approach to sourcing materials. Finding affordable yet quality furniture, décor, and building supplies is key to a successful and cost-effective makeover. This section will explore various avenues for acquiring these materials, comparing their cost-effectiveness and highlighting negotiation strategies.
Finding budget-friendly materials involves exploring diverse avenues beyond traditional retail stores. A multifaceted approach, combining resourcefulness and smart shopping habits, can significantly reduce overall project costs without compromising the aesthetic appeal of your interior design.
Budget-Friendly Furniture Sources
Several avenues offer cost-effective furniture options. Thrift stores, consignment shops, and online marketplaces like Facebook Marketplace and Craigslist often feature gently used furniture at significantly reduced prices. Repurposing existing furniture through refinishing or upcycling is another excellent strategy. For new furniture, consider budget-friendly retailers known for affordable yet stylish options, comparing prices and features across different brands before making a purchase. Factory seconds or items with minor imperfections can offer substantial savings.
Affordable Décor and Accessory Options
Decorative items can significantly impact the overall look of a space. Thrift stores and flea markets are treasure troves of unique and affordable décor pieces. DIY projects using readily available materials like repurposed jars, painted canvases, or fabric scraps can create personalized and cost-effective décor solutions. Online marketplaces also offer a wide selection of affordable home décor, often from independent artisans or smaller businesses. Remember to consider the overall style and color palette of your space when selecting these items to ensure a cohesive design.
Building Materials: Cost-Effective Choices and Sourcing
For building materials needed for renovations or repairs, exploring options beyond big-box home improvement stores can save money. Reclaimed or repurposed materials, such as salvaged wood or tiles, offer unique character and significant cost savings. Online marketplaces and local salvage yards are excellent sources for these materials. When purchasing new materials, consider comparing prices from different suppliers, looking for sales and discounts, and opting for less expensive alternatives where appropriate without compromising quality or safety standards. For example, using engineered wood instead of solid hardwood can significantly reduce costs while still providing a durable and aesthetically pleasing finish.
Negotiating Deals and Utilizing Discounts, Affordable Interior Makeover
Negotiating is a valuable skill when sourcing affordable materials. Don’t hesitate to politely inquire about discounts, especially when purchasing in bulk or during off-season periods. Many retailers offer discounts for cash purchases or for customers who sign up for their loyalty programs. Online marketplaces often allow for direct negotiation with sellers, giving you leverage to secure a better price. Always compare prices across multiple sources before committing to a purchase to ensure you’re getting the best possible deal. Utilizing coupons, promotional codes, and seasonal sales can also significantly reduce costs. For larger projects, consider getting multiple quotes from different contractors and suppliers to compare pricing and services.
DIY vs. Professional Help: Affordable Interior Makeover
Choosing between DIY and professional help for your interior makeover depends on your skills, budget, and the complexity of the tasks. Weighing the advantages and disadvantages of each approach is crucial for a successful and affordable renovation. A realistic assessment of your capabilities will prevent costly mistakes and delays.
DIY projects offer the potential for significant cost savings, a sense of accomplishment, and the ability to personalize your space to your exact specifications. However, they require time, effort, and a certain level of skill. Underestimating the time or difficulty can lead to frustration and potentially higher costs if mistakes necessitate professional intervention. Conversely, hiring professionals guarantees a higher quality finish, often within a shorter timeframe, and comes with a level of expertise that avoids common DIY pitfalls. The trade-off is, of course, a higher initial cost.
DIY Skills and Tools
Successfully completing DIY interior makeover tasks requires specific skills and tools. Painting, for instance, necessitates preparation skills (surface cleaning, patching, priming), knowledge of paint types and application techniques (roller, brush, sprayer), and the ability to achieve a smooth, even finish. Wallpapering demands precision in measuring, cutting, and pasting, as well as an understanding of different wallpaper types and their application methods. Minor repairs, such as fixing loose tiles or patching drywall, require basic carpentry and repair skills, along with appropriate tools like hammers, screwdrivers, and putty knives. Improper execution can result in unsatisfactory aesthetics or structural damage, highlighting the importance of proper preparation and technique.
Cost Comparison: DIY vs. Professional Services
The cost savings of DIY versus professional services vary significantly depending on the task. While some tasks, like painting a single room, are relatively straightforward and inexpensive for DIY, others, such as complex tiling or electrical work, are best left to professionals due to safety and quality concerns. The following table provides a cost comparison for various aspects of an interior makeover, assuming a mid-sized room in a typical residential setting. Prices are estimates and can vary significantly based on location, materials, and the complexity of the job.
| Task | DIY Estimated Cost | Professional Estimated Cost | Notes |
|---|---|---|---|
| Painting a Room | $50 – $200 (materials) | $300 – $800 | DIY cost is primarily materials; professional cost includes labor and often materials. |
| Wallpapering a Room | $100 – $300 (materials) | $500 – $1500 | More complex than painting, requiring precise technique. |
| Minor Repairs (patching drywall, fixing loose tiles) | $20 – $100 (materials) | $100 – $300 | Cost depends on the extent of the repairs. |
| Installing New Flooring (laminate) | $300 – $800 (materials) | $1000 – $3000 | Labor-intensive task; professional installation ensures proper fit and longevity. |
Transforming Spaces with Paint and Decor
Strategic use of paint and carefully chosen décor can dramatically enhance a room’s aesthetic appeal without breaking the bank. By understanding the impact of color psychology and employing clever decorating techniques, even a modest budget can yield impressive results. This section will explore how simple changes can transform a space, focusing on affordable options and practical advice.
Paint is arguably the most impactful and affordable tool for interior transformation. A fresh coat of paint can instantly brighten a room, mask imperfections, and completely change its mood. For instance, a small, dimly lit room can feel significantly larger and brighter with a coat of white or a light, neutral color. Conversely, a large, airy room might benefit from a warmer, more saturated hue to create a cozier atmosphere. Consider the existing light sources and the overall feeling you want to achieve – calm and serene, energetic and vibrant, or something in between.
Achieving an affordable interior makeover often hinges on clever solutions. A key element is maximizing space efficiently, and that’s where exploring practical storage options becomes crucial. Check out these fantastic ideas for functional storage at Functional Storage Ideas to help you declutter and create a more organized, and therefore more visually appealing, home. By implementing these strategies, you can significantly upgrade your interior without breaking the bank.
Color Selection and its Impact
The psychological effects of color are well-documented. Cool colors like blues and greens create a sense of calm and spaciousness, while warm colors like reds and yellows evoke feelings of energy and warmth. Consider the function of the room when choosing a color palette. A bedroom might benefit from calming blues or greens, while a kitchen or dining area might be better suited to warmer, more inviting tones. Using a color wheel can help you choose complementary or analogous colors that work well together, creating a harmonious and visually appealing space. For example, pairing a soft blue with a muted yellow creates a fresh, airy feeling, while combining terracotta with deep greens evokes a sense of earthy comfort.
Affordable Décor Items and their Application
Adding personality and style doesn’t require expensive furniture or artwork. Affordable décor items can significantly elevate a room’s aesthetic. Consider using inexpensive textiles like throws, cushions, and curtains to add texture and color. A vibrant throw blanket on a neutral sofa can instantly add warmth and visual interest. Similarly, inexpensive curtains can transform a window, adding privacy and style. Thrift stores and flea markets are excellent sources for unique and affordable décor items such as mirrors, vases, and decorative bowls. Repurposing items you already own, like old jars or picture frames, can also create interesting and unique décor pieces. For example, old jars can be painted and used as vases, while picture frames can be decorated with fabric or wallpaper scraps.
Creating a Cohesive Design Scheme
Creating a cohesive design scheme doesn’t require a large budget. The key is to select a few key colors and textures that will be repeated throughout the room. This creates a sense of unity and visual harmony. For example, you might choose a base color for the walls and then incorporate that color in smaller accents throughout the room, such as throw pillows, curtains, or artwork. Repeating patterns or textures, such as stripes or floral prints, can also help to tie the room together. Using inexpensive materials like fabric scraps, paint, and repurposed items can be creatively incorporated to achieve a polished and unified look. A well-placed mirror can also add depth and brightness to a room, making it feel more spacious.
Repurposing and Upcycling
Repurposing and upcycling existing items is a fantastic way to achieve a stylish and affordable interior makeover. By creatively reimagining what you already own, or finding discarded treasures, you can significantly reduce costs while adding unique character to your home. This approach minimizes waste and allows for personalized touches that reflect your style.
Repurposing involves giving old items a new function without altering their original form significantly. Upcycling, on the other hand, takes it a step further by transforming old items into something entirely new and often more valuable. Both techniques are essential tools in budget-friendly interior design.
Repurposing Furniture
Repurposing existing furniture is a simple yet effective method to refresh your space without breaking the bank. An old wooden dresser, for instance, could be transformed into a unique bathroom vanity with a new countertop and sink. A sturdy old ladder can become a charming bookshelf, while an outdated headboard might find new life as a decorative wall piece. The key is to identify the item’s inherent strengths and envision its potential in a different context. Consider sanding and repainting furniture for a quick and easy update. Adding new hardware, such as knobs or handles, can also dramatically change its appearance.
Upcycling Techniques
Upcycling involves transforming old or discarded items into something entirely new and improved. This might involve combining different materials or altering the item’s structure. For example, old window frames could be upcycled into stylish mirrors or wall art by adding a reflective surface. Empty glass jars can become elegant storage containers with a fresh coat of paint and decorative ribbon. Old pallets, readily available and often free, can be disassembled and repurposed into headboards, shelving units, or even coffee tables with some sanding, painting, and possibly a protective sealant. The possibilities are limited only by your imagination and creativity.
Resources and Tutorials for DIY Upcycling Projects
Finding inspiration and guidance for DIY upcycling projects is easier than ever. Numerous online platforms offer a wealth of resources. Websites like Pinterest and YouTube are brimming with tutorials, showcasing step-by-step instructions and creative ideas for various upcycling projects. Many home improvement blogs and magazines also feature articles and projects that are both visually inspiring and practically achievable. Searching for specific terms like “upcycled headboard,” “pallet coffee table,” or “repurposed dresser” will yield a plethora of results. Local libraries may also offer books and magazines on DIY and upcycling projects, providing further inspiration and practical guidance.
Maximizing Space and Light
Creating the illusion of spaciousness and brightness in a small room is achievable through clever design techniques and affordable solutions. By strategically manipulating light and furniture placement, you can dramatically transform the feel of even the most compact living space, making it feel airy and inviting. This section explores practical methods to achieve this transformation without breaking the bank.
Small spaces often feel cramped due to a lack of natural light and poorly utilized floor space. However, by incorporating a few key design elements, you can significantly improve both the perceived size and brightness of a room. This involves maximizing the existing light sources, strategically choosing furniture, and employing optical illusions to create a more expansive feel.
Achieving an affordable interior makeover is easier than you think. A simple way to refresh your space without breaking the bank is by strategically adding unique pieces. Consider browsing a curated collection of Unique Home Accessories to find statement items that dramatically impact the overall look and feel of a room. These carefully chosen additions can elevate your home’s aesthetic significantly, making your affordable makeover feel luxurious and personalized.
Utilizing Natural Light
Maximizing natural light is paramount in making a small space feel larger. This involves strategically placing mirrors to reflect light deeper into the room. A large mirror positioned opposite a window, for instance, can double the perceived light. Sheer curtains, instead of heavy drapes, allow more light to filter through while maintaining privacy. Consider also trimming overgrown plants or shrubs outside windows that may be blocking sunlight. Cleaning windows regularly is another simple yet highly effective way to improve natural light penetration. Even slight improvements in light transmission can have a significant impact on the overall brightness and spaciousness of a room.
Enhancing Artificial Lighting
Strategic placement of artificial lighting is crucial for supplementing natural light and creating a warm, inviting atmosphere. Layered lighting, combining ambient, task, and accent lighting, provides versatility and prevents harsh shadows. Ambient lighting, such as a ceiling fixture or recessed lights, provides overall illumination. Task lighting, like desk lamps or floor lamps, focuses light on specific areas for reading or working. Accent lighting, such as wall sconces or spotlights, highlights artwork or architectural features. Affordable options include LED bulbs, which are energy-efficient and long-lasting, and inexpensive lamps from discount stores or thrift shops. Consider using brighter color walls to reflect more light and using light colored furniture to avoid absorbing light.
Strategic Furniture Placement
Furniture placement significantly impacts both the functionality and visual appeal of a room. Avoid overcrowding the space by choosing multi-functional furniture, such as a sofa bed or storage ottomans. Positioning furniture away from walls can create a sense of openness. For example, floating shelves mounted on walls free up floor space and provide extra storage. Light-colored furniture reflects light better than dark furniture, making the room feel brighter. Using transparent or glass furniture, like a glass coffee table, can also create a sense of spaciousness by allowing light to pass through. A well-planned furniture arrangement not only optimizes space but also improves the flow and functionality of the room.
Illustrative Examples
Transforming your home doesn’t require a fortune. These examples demonstrate how affordable materials and simple DIY techniques can create stunning makeovers. We’ll focus on practical solutions and achievable results, proving that a stylish and comfortable home is within everyone’s reach.
Living Room Makeover: Coastal Calm
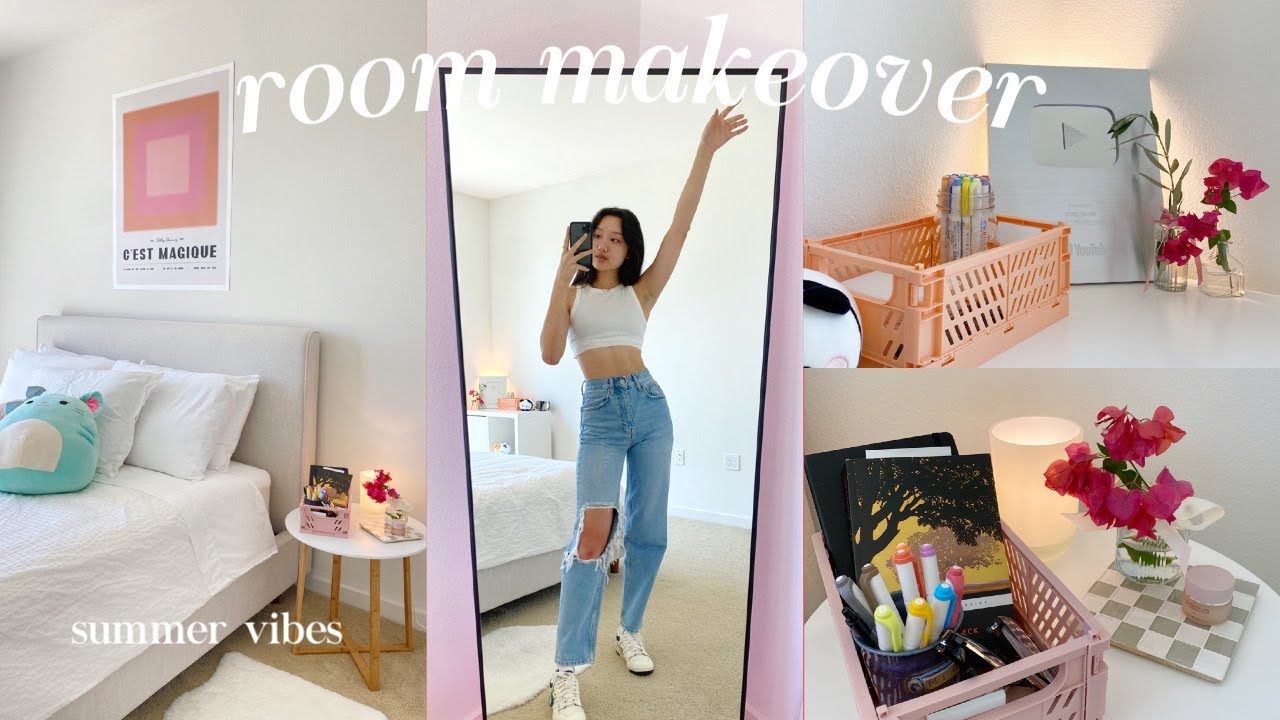
This living room makeover embraces a calming coastal theme using budget-friendly materials and DIY techniques. The existing beige walls were painted a soft, sandy beige (similar to Benjamin Moore’s “Pale Oak”), creating a neutral backdrop. A large, inexpensive jute rug in a natural tone anchors the space, adding warmth and texture. Instead of buying new furniture, existing pieces were reupholstered using a durable, affordable cotton fabric in a subtle blue and white stripe. This fabric echoes the coastal theme without being overwhelming. Two inexpensive wicker baskets serve as stylish storage solutions, adding to the relaxed feel. Lighting was enhanced by replacing a dated chandelier with three simple, inexpensive pendant lights in a brushed nickel finish. These pendants were spaced evenly across the ceiling, providing ample, even illumination. The final result is a bright, airy space that feels both inviting and sophisticated.
Bedroom Makeover: Serene Sanctuary
This bedroom makeover prioritizes maximizing space and creating a calming atmosphere. The walls were painted a soft, muted grey (similar to Sherwin-Williams’ “Agreeable Gray”), which makes the room feel larger and more tranquil. To maximize space, a large, built-in wardrobe was replaced with a slim, mirrored wardrobe that visually expands the room. The mirrored surface also reflects light, making the room appear brighter. The bed is dressed with simple, affordable bedding in calming shades of white and light blue. A small, inexpensive nightstand was chosen to avoid cluttering the space. The existing lighting was supplemented with a strategically placed floor lamp with a soft, warm light, perfect for reading or relaxing. This lamp, along with a few strategically placed fairy lights behind the headboard, adds a touch of elegance without being overwhelming. The overall effect is a calming, spacious sanctuary perfect for rest and relaxation.
Summary
Ultimately, an affordable interior makeover is achievable with careful planning, creative resourcefulness, and a willingness to embrace DIY projects where appropriate. By prioritizing your needs, sourcing materials strategically, and leveraging simple design techniques, you can dramatically improve your living space without exceeding your budget. Remember, the key is to focus on creating a space that reflects your personal style and enhances your comfort and well-being—all while staying within your financial means. This guide provides the tools and inspiration you need to embark on this rewarding journey.